Friday, May 9, 2014

Simplicity 4650, dress w/ collar variations


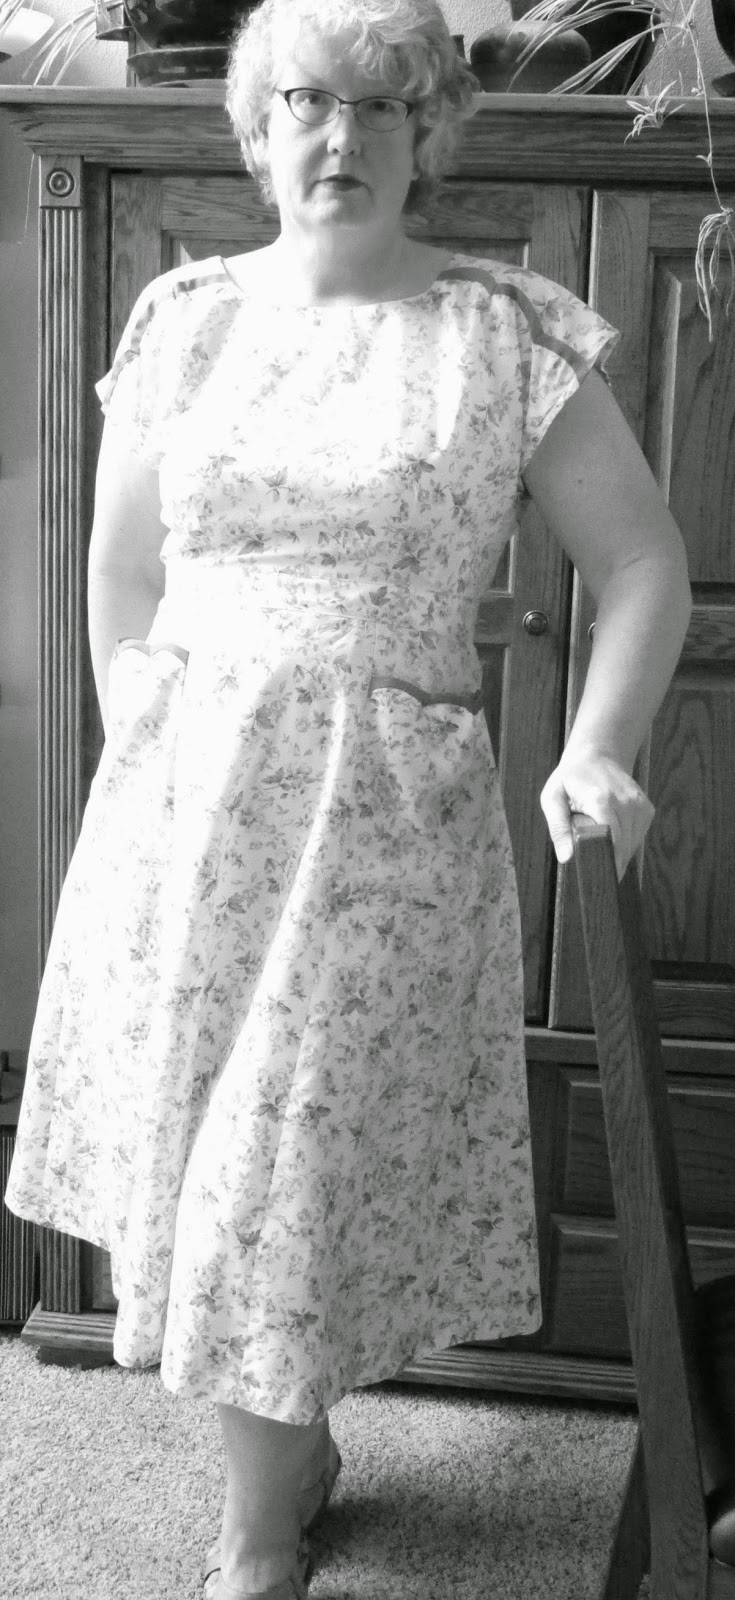
Finally, another vintage pattern (almost) completed. I can't find a 1" wide white plastic buckle (although hot pink would be even better) anywhere, so I used a skinny red belt that I have for these pictures. It looks unfinished without a belt.

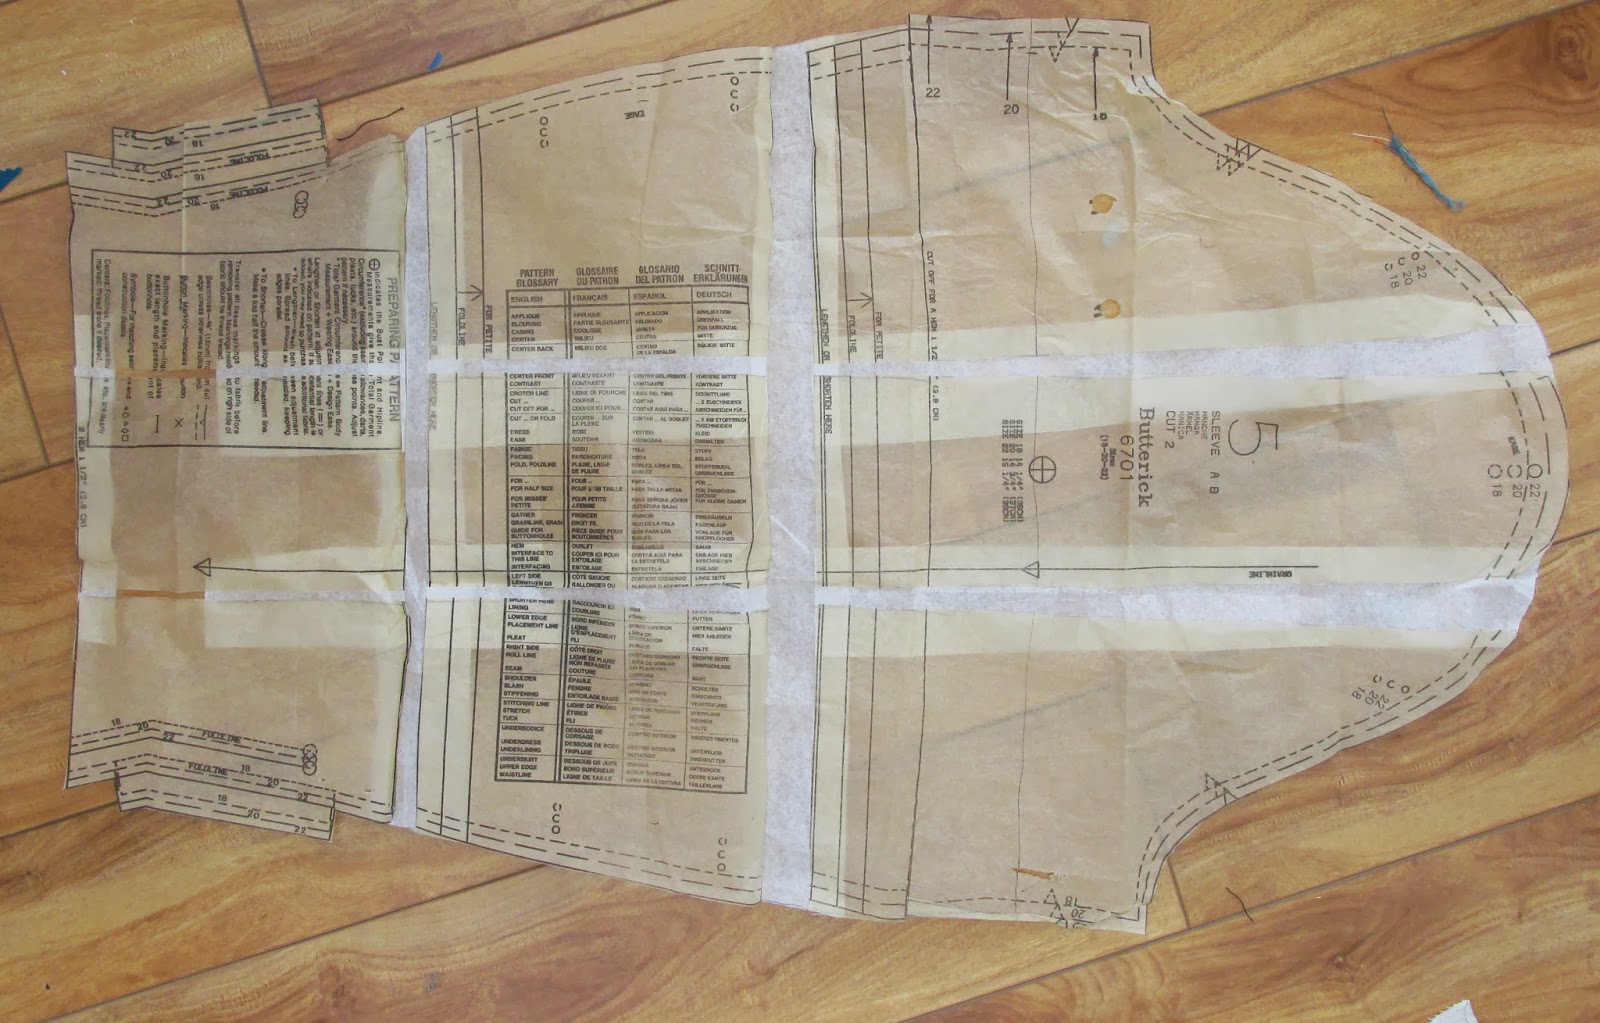
I wrote about altering the pattern to my size in this post.


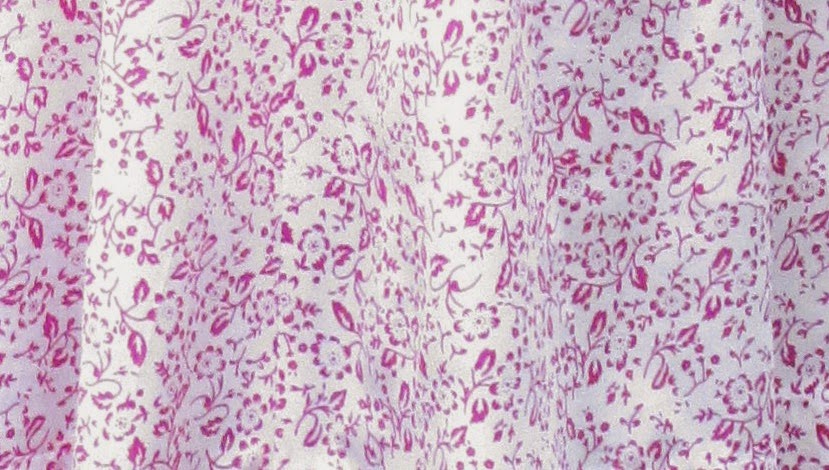
I'm very pleased with this. I took my usual massive shortcuts in construction since this is a throw-away dress (here's hoping it does not get too baggy before the end of summer). I used $1 yard polyester from Walmart. I love the pink - it is a hot pink. I don't care for baby pink, but I like hot pink. I wore the dress all day, even managing a 2 hour band rehearsal (I play trombone) in it. I don't normally wear all-over pink, but I'm making myself try out new things.


I applied fuseable interfacing to the facing pieces, rather than sew-in interfacing to the bodice pieces. I did not hand stitch the back of the bias binding in place, I edgestitched with the machine, so it is not even folded over nicely on the inside. But it looks good from the outside. I machine stitched the hem, not even blind-hemming it. The sleeves are finished with bias facings, as the instructions called for. The side zipper is just inserted in the seam, I did not do a lapped zipper for this.

I have a 1" wide interfaced belt in the pink print waiting for the right buckle. I disregarded all belt instructions and made it by using copious amounts of heat-n-bond (for applique) and a bit of invention.
I cut two 1" wide strips of lightweight heat-n-bond, applied the strips to the wrong side of the fabric, roughly cut out around the applied strips, left the backing paper in place, but turned the edges over and pressed the folds in. Then I removed the backing paper, and ironed the turned edges over the exposed heat-in-bond. I cut another 1" strip of heavy weight heat-n-bond, applied it to the backside of one completed fabric strip, then ironed the other fabric strip over it, making sure the edges lined up nicely. I edge stitched the long edges and turned over one short end instead of making a fancy point.

The fit is acceptable, considering I will never use this particular incarnation of the pattern again (the original size should fit me well when I'm done losing weight). I had done a full bust alteration which turned out to be too baggy on the sides of the dress, so I just took a larger dart there. Which makes the tip of the dart a bit strange, as the dart is now quite wide at the base and relatively short. The print of the fabric helps hide this. As does my cardigan habit.

The next version I make of this dress will have the lovely wide collar included.


Saturday, April 19, 2014

Marian Martin 9154, wrap dress with scallop details (Updated!)


New photos (same as added to Sew for Victory 2.0 Flickr photopool)

Finished with olive buttons in back.


I am new to grading patterns up to fit me. Previously, I've just stared longingly at too-small patterns. I've done two so far: this was actually the second one. The first one (a 1954 Vogue dress) is cut out waiting for some more free time.


I'm using the Threads article on pattern grading as a guide, where you slash and spread along specific vertical and horizontal lines. No way am I a 34 bust. More like a 40 high bust. So that's a lot of sizes to alter past!
More, I think, then a novice is supposed to.

I have always wanted a back wrap dress, like the famous Swirl dresses, and this dress is sort of maybe close. It has a V neck in back (Swirl dresses generally don't) but I like it anyway.

My first muslin (just the two bodice and two facing pieces) was very troubled, with a huge annoying ripple on the back, more on one side than the other.


My husband pronounced it "Wonky."

I pondered this for a few days, eventually concluding that my attempts at drafting the pattern up were not at fault, but rather my lopsided shoulders were.

So I made it difficult on myself when making the yellow flowered version.

I started by making the pockets, then assembling the skirt, then interfacing and attaching one of the set in belt pieces.

Then I staystitched the living daylights out of the bodice piece, proceeding on to the four darts in bodice pieces.

Then I did the scallops on the front, attached the facings to the front and back (yes, the fronts are back were not stitched together yet), sewed the side seams (still no shoulders seamed together, ugh), sewed the bodice to the belt and skirt, roughly pinned the shoulders in place, tried the dress on, fixing the dress' overlap at the shoulders so the back of the dress lay nicely with no wonky ripples.

Whew? Followed all that? Basically, I made the dress backwards from the directions.

The right shoulder (as I wear it) is about like the pattern pieces were supposed to go together, but the neck-line edge of the left side is an inch further overlapped than the pattern called for.
Then I finally sewed the facing together and to the neckline, stitching the scallops down after that.


I took numerous shortcuts on this, machine stitching (badly!) the bias down instead of sewing by hand, and machine stitching every turned edge: sleeves, back skirt, hem, even if it came out ripply and weird. I don't have two matching buttons on hand that are large enough for the back waist, so it is pinned in the pictures. What a hatchet job!

Because my waist is a bit large still, the dress does not overlap as much as it ought, so my husband stuck a pin in the bottom of the V to keep my bra band from peeking out. I'll add an interior button and hole when I get around to it, I can take the button off when I don't need it any more and the hole will be under the overlap anyway. I believe I can wriggle into the dress with the bottom-of-the-V button fastened.

I used some super cheap polyester? rayon? mystery fabric from Walmart's discount bin for this wearable trial run. At $1.50 / yard how could I go wrong? Well, um, errrr.


I decided to go with olive green for the bias trim on the scallop details. The only type I had was double fold which was far to heavy for the thin and cheesy fabric.
For the pockets, I interfaced the top edge with lightweight fuseable. (Same for the facings). I'm not sure it helped the bias binding process very much. So I used The Power of Steam to get the pockets to behave. I did not interface the shoulder scallops. No easier, no harder than the pockets. Jury's out.
I also took some tiny tucks at the Vs between the scallops, to make the scallops more scallop-ish.

Yes, that was handsewing. I also handsewed the final placement of the shoulder overlap. Thank goodness for 15 minutes of Mega Piranha on the SyFy channel.

So I can't say it is done, but I can say it has a lot of promise.

I like the set in belt, which defines my waist a bit. I like the scallop details - even the pockets, which I might modify to protrude  a little less next time. I even like the yellow flowered print, something I was very unsure about to begin with.

The pockets are very high up on the skirt. Awkward to get my hands in there. Are they supposed to be that high?

When I graded the skirt, I added length through the middle of the pocket as well as the skirt. I may move that grading line to above the pocket altogether and return the pocket to a 3/4" shorter condition.

I'm pleased with this pattern and my attempt here. I'm looking forward to trying more vintage patterns as I have the time.


Tuesday, April 1, 2014

Altered states (updated)

Blogger has lost all the images that I included in this post. And I don't seem to have them on my computer anymore. Waaah!

So this post is essentially broken for good. Sorry.
When I do some more slash and spread grading, I will make a new post!

[things in brackets] used to be images.

Begin original post.

I have a handful of vintage patterns (original ones) either from my mom or from the thrift store. All of them are too small for me, so I decided to try my hand at altering them by slash and spread grading. Google around and you will find many pages on this. Threads has a good one.

This is the result of a 1954 size 18 (36 bust)
 
[pattern cover]


pattern graded up (we hope) to fit me with a 42" high bust measurement. That's a huge change, I know, but why not try it?

[bodice front]

After I finished the basic grading changes, I went ahead and did a full bust adjustment, fervently hoping I did not add insult to injury.
[sleeve image]

I measured the sleeve diameter after the grading and decided to add 1 1/4 inches. I did this by slicing right up to the top of the sleeve in five places and nudging the bottoms of the slashes out one-quarter inch each.

I have a handful of doll commissions to finish before I can do a muslin and try out the results of my mad slashings!

UPDATE

I did a muslin in Cat in the Hat fabric. It is cute! The bust is too big, so I took a bigger bite on the side bust dart. I'll make this in some cheap pink fabric from Walmart real soon now (it is cut out and waiting for me).

Monday, March 31, 2014

Smocking experiments

Last year, I inter-library-loaned a 1948 book on smocking Stitching for Style by Nelle Weymouth. Finally, I'm getting around to trying some of the designs.

This is lazy-smocking, as all the thread tails are on the right side of the fabric, and I did the work on scraps of $2 polyester lining fabric.

I had high hopes for the Columbine pattern, but three out of the four flowers look rather sad. My favorite is the lower right one.


I like the Rose Trellis quite a bit - I can see it on the yoke area of a blouse or on the sleeves somewhere.


I may sit down and try a few more patterns, since I have more of the green left.

Monday, March 10, 2014

Butterick 6701, 1943 vintage reissue blouse

1943 reissue pattern from Butterick (2000), now out of print.

"Fitted blouse, has shoulder pads, princess seams, shaped hem and button trim with snaps. A: lined, above-elbow sleeves. B: long sleeves with slits/hooks and eyes and back peplum."

This blouse is a princess seam, but the seams go to the shoulder, rather than to the armscye. I like this kind of princess seaming better than the seams that go to the armscye.

I've made this blouse before, view B in a mustard yellow linen. I liked it but the linen was a pain - wrinkle wrinkle, needed ironing all the time. That blouse is long gone.

So this time I dug around in my dwindling stash of fabric and found enough cotton-blend eyelet to make it again. This time, I did view A, a view that is supposed to be lined and has less of a rear peplum than view B.

I had made my previous alterations directly on the pattern pieces, not something I do often. I had lengthened the body 1 inch and generally cut out a 22 with some extra flare at the hips. It was easy to trace over in my currnet size. Whew!

I eyeballed a full bust adjustment for the center front piece, after tracing the pattern over with an 18 shoulder/neck (based on my high-bust measurement) and a 22 waist and hip.

I played around with changing the shoulder line a little bit as I knew I would not be using shoulder pads for this garment. I took about 1/2 an inch out of the side back at the shoulder seam.

I remember having to enlarge the sleeve pattern quite a bit, and my memory was confirmed when I unfolded the sleeve and saw all my painstaking alterations.


I decided the alterations were still good, and traced it over, just changing it at the sleeve head to an 18 from the 22 I had originally altered. I added 1" above the elbow and 1/2" below, and a total of two inches at the sleeve head, tapering to less at the wrist.

Due to my messing with the sleeve pattern, my sleeve head is perhaps gathered into the armscye a bit more than the design intended, but I think it looks all right.

I did not line this, neither did I create facings. I bashed out a lot of bias strips in a not-totally-far-out blue poly-cotton broadcloth and just faced the edges. Then I pressed the bias to the inside and stitched around the edge from the outside.


The inside is finished to the extent that I bothered to cut the pieces out with my pinking shears.
I used some largish sew-on snaps to close the front.

I do get drag lines on the upper arm when I have my elbow folded even the smallest amount - this could be in part due to the missing shoulder pad. Or just my fat arms? Both!

 I'm not actually sure what the differences are between an armscye and sleeve head that is designed to have a pad, and ones that are not. I should figure this out and do a better job on the shoulder fit next time.

The waist at a 22 fits nicely, but I needed to let the center front opening flare a bit more than designed to accomodate my shrinking but still present cookie-belly. I do like the shape that gives the front of the blouse.

Overall, I'm pleased with this. The eyelet fabric (which used to be white but I dyed it blue years ago with Dylon machine dye) makes the blouse a bit dressier than I intended, but I'll be wearing it to my stepson's pre-wedding meet-n-greet so I think it will fit right in.
 
When I make this again, I'll be skinnier, but I think I'll still make the front pattern pieces a bit longer, as the blouse over a modern rise pant leaves a little bit of a gap at the center front. Over a skirt or pants that fit at the natural waist. it looks just fine, but then again, that's what it was designed to be worn with in the first place!

Wednesday, March 5, 2014

Vogue 8788 wrap dress, 1954 reissue

Hurrah for reissued vintage patterns!

I love a nice wrap dress, and it will be a useful piece as I continue to go down in size.

I don't feel particularly emotionally or financially attached to this garment, as the whole thing cost a mere  $13.09 US plus tax.
Including the pattern.
I used Joann Fabrics' 'Symphony' broadcloth and a 50% coupon to buy the 5 yards required, and the pattern was on sale, and the thread was on sale, and the two packages of hem binding I used (label dated 1969) came from the thrift store for a whopping 30 cents a piece.
I prefer rayon binding over polyester. I have a whole roll of Hug Snug in a blue that is lots darker then the dress so I was glad to have the Wright's on hand.


I finally had the wit to use my high bust measurement for this garment, coming out somewhere between a 18 and a 20, depending on inhalation or exhalation. I chose to exhale. Then my waist is a 22 or thereabouts, as I chose to inhale for that measurement. Switching across 3 sizes on a pattern where the fronts and backs extend out a ways and wrap around did not yield a completely obvious path. But I made do.

Then I further complicated things by doing a slapdash full bust adjustment, to take it to about a 20. Not content with a pattern resembling a particularly gruesome crime show corpse, I added insult to injury and lowered the bust point 1 inch.

The back extensions wrap around the waist and hook together. That worked. The front extensions are supposed to do the same, but in the back. Mine missed by a bit, probably due to our friendly neighborhood slasher. So I used the tie option.


Oops, I see that the back rucked up a bit under the tie. Hm. It will be nice to do the pattern again when I'm more consistently sized top to bottom.


I let the dress hang on my tailor's dummy for a day or so, then got my husband to mark an even hem for me.

It's raining cats and dogs so this is a particularly inappropriate dress at the moment, but I'm looking forward to a pretty dress that I can wear when I want a little lift.

Thursday, February 27, 2014

The Half-Circle Skirt

I have had a 3 yard piece of Pendelton wool plaid that I've used as a shawl for years, since I couldn't work out what I wanted to make from it.

Tada!


That's about a 40 inch waist and the skirt comes to somewhere below my knee. Looks fairly dire on the hanger but OK on me.

I drafted the pattern by using some circle math and all four pattern pieces are identical. Quick and dirty.

The cf and cb bias seams match perfectly, but the side seams don't. If you look at this picture


you can see that the lighter stripe is made up of white, then light blue, then medium blue.
That is not a bi-directional pattern. So my sideseams line up in the larger picture - wide dark stripes and wide light strips and the thin white double lines and single reddish lines, but the white/light blue/medium blue strips are inverted from front to back. I would have needed 6 yards to match the plaids all the way around.

I just did a simple placket closure as I plan on taking this skirt in a considerable amount next fall if possible.

Next time, I'll probably try this in a large check cotton and pastels for summer.


1940s slip pattern, Mrs. Depew Vintage #325

The other day, I downloaded an interesting slip pattern from Mrs. Depew on Etsy. It is pattern #325, a 1940s slip with contrast panels and a scalloped center front embellishment.

This pattern is from a French system of patterns, designed for home sewists. If you've heard of the Lutterloh system, it is kind of like that. You'd receive a miniature pattern and a set of special rulers. You would use the pattern and the rulers to scale the pattern up to the desired size. The Etsy vendor sells a PDF which has helpful instructions (translated to English), pages of rulers to tape together (in centimeters) and of course the tiny pattern.

I drafted the pattern up for a theoretical 48" bust, grabbed some unbleached muslin, and went to town with the sewing machine. I didn't even iron the muslin until I had sewn the pieces together. That's how excited I was to dig in.

The muslin was pretty close, but rather baggy in the torso and short: and came to just above my knees (I'm tall). So I pinned out the excess, transfered the changes to my paper draft, and then set about copying the draft over 4" longer, with legible notes and my best guess at construction order.
 
 After carefully adding 3/8" seam allowances that were actually measured, rather than eyeballed on wrinkly muslin, I discovered that this pattern probably had seams allowed already. Oh well, too late.
And further pondering produced the insight that I should have used my high bust measurement (41" now) from the beginning, which probably would have still been all right.

I decided to make it again in the muslin (after washing and ironing the rest of it 0_0 ) and use the results as a nightgown. While the fabric was in the wash, I did my best to devise a pattern layout for economical fabric use.
I came up with a lazy 2 yards and 10 inches. I think if I did a layout on unfolded fabric, I might do better. But that takes more space to cut out and involves flipping and flopping pattern pieces around. Fugeddaboudit.

I spend most of my sewing time making doll clothes for my Etsy store, so I try to run my own clothes together as quickly as possible. Especially trial versions that will be too big eventually (see the post).
I stitched the seams with a double needle in red thread, from the right side (lots of lapped seams on this). The side seam was the only one not lapped
I also decided to cut the center front embellishment of red also, and bind the top edge in red. Those two were stitched with a single needle. I did not do the front inserts in contrast, although the red stitching on the top picture shows where they are.
I made wide straps since this would be a nightgown.

My order of construction was to first do any stay stitching I felt necessary, then making the front assembly (center front, contrast insert, and side front - pcs 3, 4, & 5 on the original pattern) with the contrast insert lapped over the other two.
Then I lapped the bodice front (#2) over the front assembly. That took care of all the double needle stitched lapped seams, and I switched to a single needle and sewed the side seams, switched to red thread and stitched the front embellishment in place.
I did a quick-n-dirty overcast hem in red.

It looks good! I'm excited to try making a slip in an inexpensive synthetic. The slip will have simple ribbon straps and probably simple seams. I'll save a lux hand-stitched silk version for My Skinny Future Self (see this page for an explanation).

Tuesday, February 25, 2014

Wardrobe thoughts

I want a wardrobe of clothes I like, in colors that suit me, that will work together nicely. Is that so much to ask?

I cruised the Vintage Ad Browser (google it) in the clothing category in the decade of 1940, delighted by the color combinations there. Wine with bright green, Copenhagen blue with goldenrod, dark teal and dusty pink, muted red and pale green - so many pretty colors!

Inspired by these colors and by the Fashionable Forties' blog (which details a Swedish wardrobe plan from the 40s and the blogger's journey through the process of making such a wardrobe) I've settled on two palettes of neutral colors: one for fall/winter and one for spring/summer. Yes, we do have at least 2 seasons here in northern California.

Fall/winter colors are brown, wine, and dark teal, with Copenhagen blue, navy, and goldenrod for spring/summer. Each set of neutrals will work well together, and my several red accents I already have (belt, shoes, handbag) will work with all six colors. I will try to collect some green accents for fall/winter, and white for spring/summer.

What clothes shall I make? More importantly, what clothes will I wear? I'm not keen on dresses or suits - I'm a casual person, with no need or desire for dressing "corporate". I like separates, so blouses and skirt and trousers. I'll make two dresses (maybe three) and several trousers and skirts, and as many blouses as I can stand. Some jackets of the same colors and materials as a few of the skirts to stand in as suits if I need. But I won't wear a matching skirt and jacket very often, if at all. That's a dandy plan for when I'm holding at one size, but what to do in the meantime?

I want to have two skirts, two trousers, and two blouses that fit me at all times. So far, I have dropped one dress size about every two months. So I'll be making a couple of garments a month to stay clothed. I can do that.

I have one pair of trousers, a modern cut in a nice dark brown stretch sateen. And a pair of distinctly unflattering Levis 501 button fly that are getting baggy. For future construction, I'm looking at Wearing History's Smooth Sailing pants, and probably a self drafted less wide-legged pant.
I have a great four piece skirt pattern that is part of a Vintage Vogue reissue suit (one skirt in wine already in the closet), and I've partially constructed a four piece half circle plaid skirt (I love a plaid skirt with some swing to the hem) with bias front and back seams. It is hanging up to let the bias finish stretching out.
I have two stretch tops, and one woven cotton blouse in my closet that is not a vintage pattern, but has that feel: a mint green with sprays of flowers scattered over, pointed collar and short sleeves. I figure it has a few months left in it as I can take the side seams in a bit when I have to. I have several repo vintage patterns that I've made in the past that look good, and I realized today that I have a lot of dress patterns (what was I thinking?) that can be truncated into nice blouse patterns.
Cheap cardigans will stand in for jackets for the next 10 months.
I have one short trenchcoat in electric blue which will be loose but not horrible for I expect the next 40 pounds. I'll be very sad when it no longer fits. And a great vintage coat that I need to take in. And I'll make it again when the current coat is too large.
Yes, that is not a lot of clothes by the overstuffed standards you see on various makeover reality shows.

So I'll spend the next year trying out patterns, practicing finishing techniques, and confirming my color palettes. I will the the Queen of Cheap and Cheerful fabric.
Then in January 2015, I hope to be stabilized at a good weight, when I can start making long-wearing, lovely versions of my favorites from the previous year in quality materials.

Welcome! What's it all about, anyway?

Hi there!
I thought I ought to sit down and explain just what it is I think I'm doing here (not that that, in the end, may bear any resemblence to what I eventually do). So here goes!

I love vintage clothes, but I don't want to look like I'm unclear on the current decade. So I tend to mix vintage or classic styles in with my other clothes. Sometimes I wear hats and gloves, but rarely at the same time.

I'm about 6 feet tall and fat.
Yes, I said fat. Not overweight, not obese, not fluffy, not padded, not Junoesque. Fat. So there.
I started sewing in junior highschool, when I discovered that anything but a man's shirt from the tall section failed to reach my wrists. Now, decades and decades later I still sew many of my own clothes, rather than buying the overpriced, badly made, hideously colored tents on offer for middle aged women in the fat lady section. Or - heavens - tights masquading as leggins masquarding as jeans.

On the plus side (ha ha ha), I've been losing about 2 pounds a week since January 2014, so my old clothes are falling off me. Many have already been consigned to the local hospice organization's thrift store. And some old favorites (I didn't save many) are back on the clothes rod! I'm going from a 24 women's (US) to probably a 14 misses US. From 255lbs to 170lbs.

How am I going to cope with clothes for the next year? I don't know, so to distract myself from that issue, I'm busily planning a wardrobe for the future skinny me.

To keep myself clothed in the meantime, I'm in the process of digging through my vintage patterns (mostly Vogue and Butterick re-issues) for any pattern that either is a blouse pattern or can be used as one. I'll post as I work on various garments. These will be wearable test garments, to see if I like the style and my color choices.

And that's what this blog is all about. My wardrobe and sewing adventures.

So, what does this have to do with sieves, anyway? The title is the same as the URL. Anagram, anyone?

(This post will become a 'page' on this blog, for future visitors)