There are a number of Anne Adams patterns out there with this number, but very few I have seen are this jumper and blouse pattern.

According to the pattern information, this jumper and blouse were only published in half sizes. A 20 1/2 would have been exactly my measurements (perhaps a bit short in the waist) but the 18 1/2 that I scored from Etsy was easily altered.
 |
| With a 1954 Mcalls blouse pattern in green silk! |
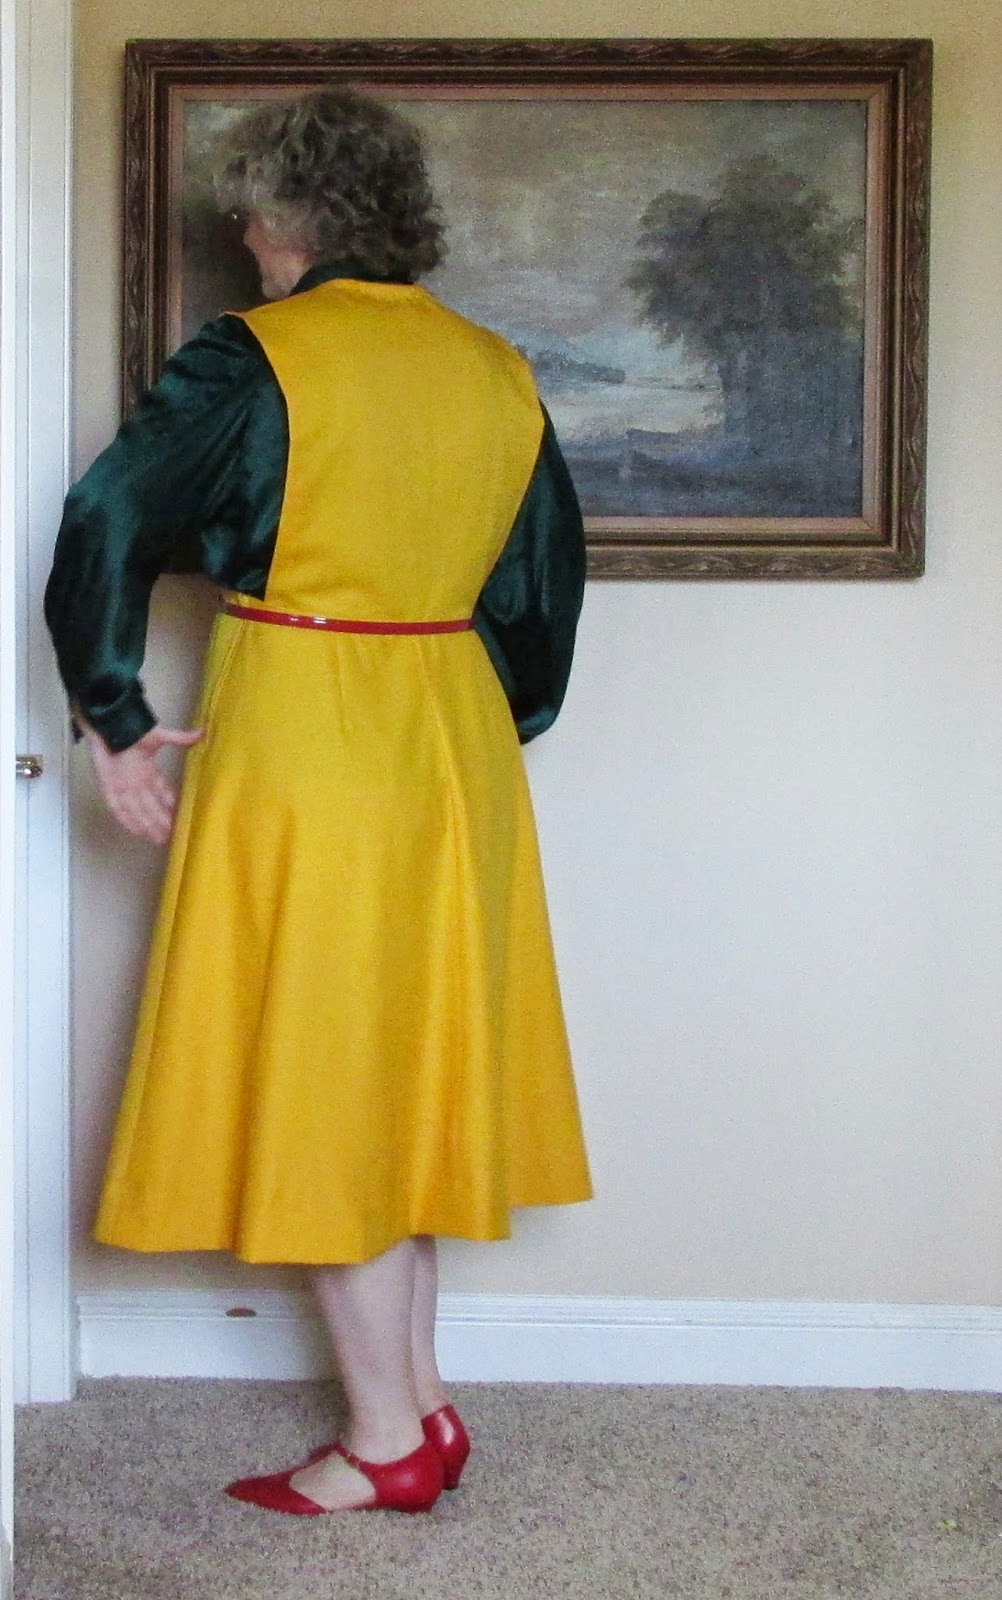
A proper photo with the matching (black) blouse.

It took me the better part of a day to copy over the original, perforation only, pattern pieces, then alter my copies by about a size up in the bust, two sizes in the hips. I added 1 inch in length to the bodice pieces.

It took me the better part of a day to copy over the original, perforation only, pattern pieces, then alter my copies by about a size up in the bust, two sizes in the hips. I added 1 inch in length to the bodice pieces.
I knew I should do a muslin, but I was pretty confident of my alterations, so I dove into some goldenrod wool in a fine, tight gabardine. I bought a lot of this years ago but just never found the right project. The picture with the blue bedspread behind is a better representation of the color than the pics with the dark green blouse.
Going into the cutting process, I figured at worst I'd have to recut the bodice of the jumper due to length miscalculations. I cut everything out with pinking shears, to avoid any time consuming seam finishing.
I sewed the major seams and the fit was good. I tried it on over a white blouse from a different vintage pattern, and decided that white was meh. Boring. Dull. Yawn-worthy.
And I noticed that I had not gotten the front edges of the bodice lined up with the points on the skirt.

I decided that black was the way to go. However, I have no black fabric so I wore a previously made dark green blouse for my DIY photoshoot (blouse is a 1954 McCalls pattern that has gone missing!)
The pattern calls for seam binding the inside edges of the bodice. I have a whole reel of Hug Snug in medium blue. Well. Ha ha ha.
AFTER I had stitched on the Hug Snug, I discovered that the blue made a slight shadow on the bodice. Since the turned under edge was very wide, I just trimmed the binding off with my pinking shears, then stitched the pinked edge down. Waaah! This is what I get for sewing at night under artificial light.
The back neck of the jumper calls for bias binding. Having no suitable color of premade tape on hand at the time, I used a self bias. A bit bulky, but I steamed it into submission!
Honestly, this inside of this jumper is a hot mess. That's OK, it looks good from the outside.

I stalled out for a few days, for lack of a zipper or premade bias for the waist, but eventually got that done as well. I bought some nearly matching pre-made bias tape for the waist.
I tried the pattern instructions for a lapped zipper (I've never done one, unless modern jeans count) and it was not exactly lapped. But it is neatly stitched so I'm not worried.
I tossed out a question to the We Sew Retro Facebook group, seeking a better understanding of the pattern instructions for the bias facing on the waist. It is mitered, which I understand how to do, but I've decided to sew facing, bodice, and skirt together in one operation next time, flipping the mitered facing down in place.

The instructions ask you to refer to step 4, where I think they really mean step 3.
You can decide if you like.


I did not add any length to the skirt, figuring that the 3" hem allowed would give me enough wiggle room for adjustments. In the end, I turned up the 3 inches anyway, as the longer length made me look dumpy. (The pic with the white blouse is the unhemmed length).
 |
| Could I consider smiling? |


