

 |
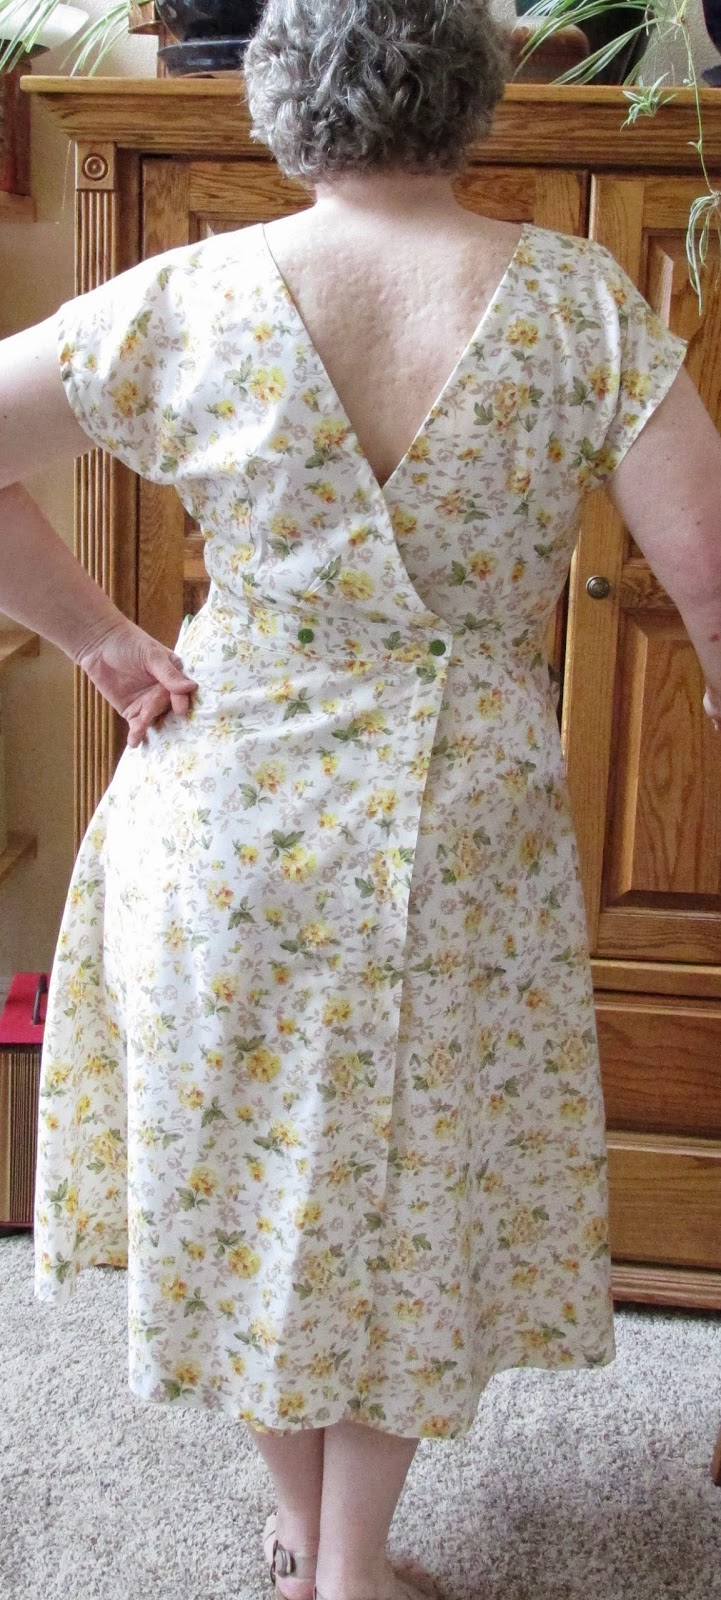
| Finished with olive buttons in back. |

I am new to grading patterns up to fit me. Previously, I've just stared longingly at too-small patterns. I've done two so far: this was actually the second one. The first one (a 1954 Vogue dress) is cut out waiting for some more free time.

I'm using the Threads article on pattern grading as a guide, where you slash and spread along specific vertical and horizontal lines. No way am I a 34 bust. More like a 40 high bust. So that's a lot of sizes to alter past!
More, I think, then a novice is supposed to.
I have always wanted a back wrap dress, like the famous Swirl dresses, and this dress is sort of maybe close. It has a V neck in back (Swirl dresses generally don't) but I like it anyway.
My first muslin (just the two bodice and two facing pieces) was very troubled, with a huge annoying ripple on the back, more on one side than the other.

My husband pronounced it "Wonky."
I pondered this for a few days, eventually concluding that my attempts at drafting the pattern up were not at fault, but rather my lopsided shoulders were.
So I made it difficult on myself when making the yellow flowered version.
I started by making the pockets, then assembling the skirt, then interfacing and attaching one of the set in belt pieces.
Then I staystitched the living daylights out of the bodice piece, proceeding on to the four darts in bodice pieces.
Then I did the scallops on the front, attached the facings to the front and back (yes, the fronts are back were not stitched together yet), sewed the side seams (still no shoulders seamed together, ugh), sewed the bodice to the belt and skirt, roughly pinned the shoulders in place, tried the dress on, fixing the dress' overlap at the shoulders so the back of the dress lay nicely with no wonky ripples.
Whew? Followed all that? Basically, I made the dress backwards from the directions.
The right shoulder (as I wear it) is about like the pattern pieces were supposed to go together, but the neck-line edge of the left side is an inch further overlapped than the pattern called for.
Then I finally sewed the facing together and to the neckline, stitching the scallops down after that.

I took numerous shortcuts on this, machine stitching (badly!) the bias down instead of sewing by hand, and machine stitching every turned edge: sleeves, back skirt, hem, even if it came out ripply and weird. I don't have two matching buttons on hand that are large enough for the back waist, so it is pinned in the pictures. What a hatchet job!
Because my waist is a bit large still, the dress does not overlap as much as it ought, so my husband stuck a pin in the bottom of the V to keep my bra band from peeking out. I'll add an interior button and hole when I get around to it, I can take the button off when I don't need it any more and the hole will be under the overlap anyway. I believe I can wriggle into the dress with the bottom-of-the-V button fastened.
I used some super cheap polyester? rayon? mystery fabric from Walmart's discount bin for this wearable trial run. At $1.50 / yard how could I go wrong? Well, um, errrr.

I decided to go with olive green for the bias trim on the scallop details. The only type I had was double fold which was far to heavy for the thin and cheesy fabric.
For the pockets, I interfaced the top edge with lightweight fuseable. (Same for the facings). I'm not sure it helped the bias binding process very much. So I used The Power of Steam to get the pockets to behave. I did not interface the shoulder scallops. No easier, no harder than the pockets. Jury's out.
I also took some tiny tucks at the Vs between the scallops, to make the scallops more scallop-ish.
Yes, that was handsewing. I also handsewed the final placement of the shoulder overlap. Thank goodness for 15 minutes of Mega Piranha on the SyFy channel.
So I can't say it is done, but I can say it has a lot of promise.
I like the set in belt, which defines my waist a bit. I like the scallop details - even the pockets, which I might modify to protrude a little less next time. I even like the yellow flowered print, something I was very unsure about to begin with.
The pockets are very high up on the skirt. Awkward to get my hands in there. Are they supposed to be that high?
When I graded the skirt, I added length through the middle of the pocket as well as the skirt. I may move that grading line to above the pocket altogether and return the pocket to a 3/4" shorter condition.
I'm pleased with this pattern and my attempt here. I'm looking forward to trying more vintage patterns as I have the time.
Job well done, and your back bodice no longer looks 'wonky'. Definitely coming right along. Are you entering it into the Sew For Victory 2.0 sew along when finished?
ReplyDeleteUm. I might? I'll look up that sewalong right now! Thanks for the encouragement!
ReplyDeleteThanks for that tip, sewmuch2learn, that sewalong is FUN
ReplyDelete